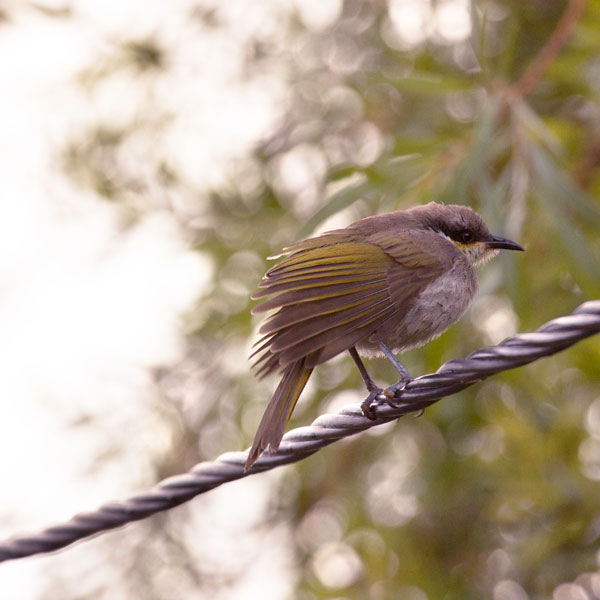
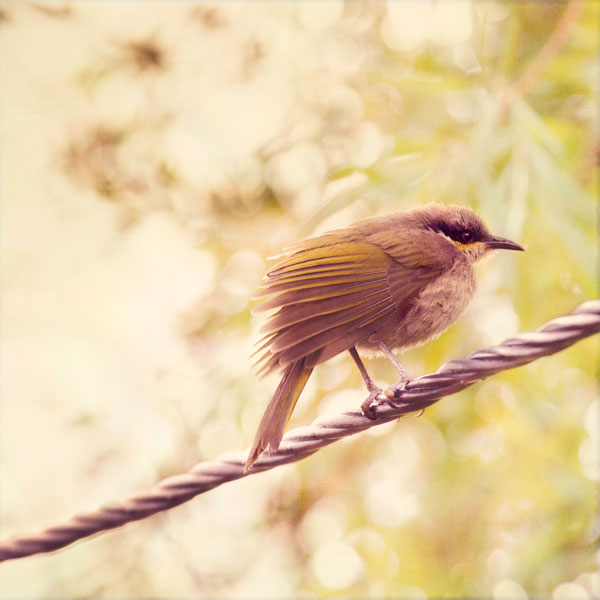
Before and after processing with texture overlays …
I was thrilled to get a photograph of this little Singing Honeyeater bird perched on a wire outside our front door one evening.
The original image was quite dark because it was taken just after sunset and I really didn’t like the division created by the dark bokeh background. I wanted to reduce the contrast in the background and lighten and soften the image overall.
Photoshop Texture Recipe:
In Photoshop I duplicated the original image and set the duplicate layer’s mode to Screen: 100%. I repeated the process until the imaged was ‘bleached’ to the desired level. In this case I used 3 screen layers in total.
On each layer, I used a layer mask to remove the ‘bleaching’ effect where it wasn’t wanted. When using layer masks, I avoid duplicating the layer with its mask, because it can create a harsh ‘cut out’ effect. Instead, I remove areas on each layer’s mask independently to allow variations with each layer.
Once the desired level of lightness is reached, I merge the visible layers onto a new layer while keeping the original layers below (on a Mac: Shift+Option+Command+E on a PC: Shift+Ctrl+Alt+E). For the recipe, I’ve called the result ‘merged layers’ (shown above as the before-texture image).
Using 3 screen layers introduced a lot of ‘noise’ (damaged/grainy areas). Sometimes, I don’t mind a bit of noise because it adds character, but in this case it created a little too much ‘character’ so I softened and disguised the noise with textures.
I didn’t want to lose the feel of a photo so I chose two soft textures without obvious grain.
Textures
Left to Right:
Hippy Chick – a texture from mother of pearl with a very slight woven grain and edge detail
Purple Bokeh – a soft purple and white abstract texture of reflections on glass, which I use when I want to add bokeh, light, and a hint of magic.
(to view the textures at a larger size, click on the thumbnails below)
Recipe
- ‘Merged layers’: Normal 100%
- Hippy Chick: Multiply 70% (to darken the image & recover depth of colour)
- Purple Bokeh: multiply 100% I didn’t want to add a purple tint to the image so I used a Hue/Saturation Adjustment Layer (set to colorize) to change the colour of the texture from purple to green
- Purple Bokeh: multiply 30% with a Hue/Saturation Adjustment Layer (set to colorize) to change the colour of the texture from purple to yellow.
- Hippy Chick: Soft Light 100%
- Hippy Chick: Linear Burn 15%
- ‘Merged layers’: SoftLight40% (to blend the original image with the textures)
- ‘Merged layers’: Lighten 40%
- Colour layer (yellow: f7e090): multiply 40% (to create a soft buttery yellow haze)


